Figure Drawing
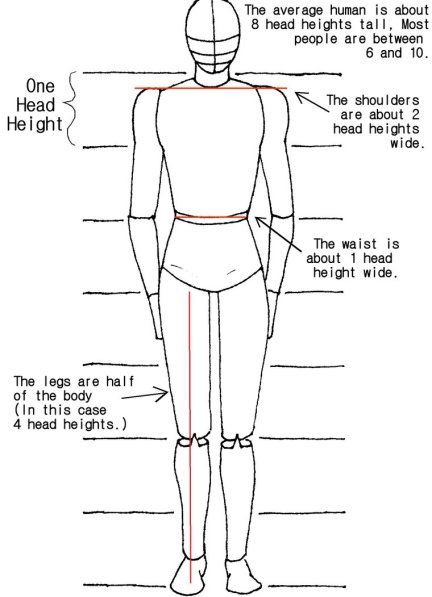
Proportions
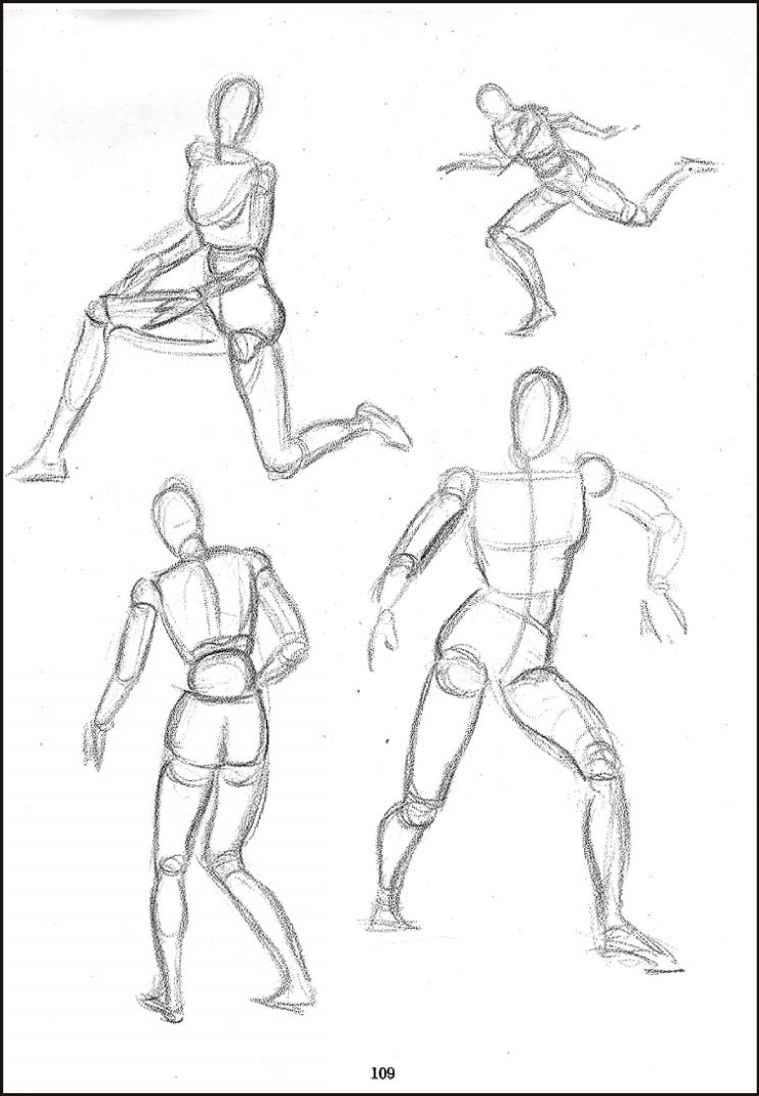
You will be drawing a simple manikin figure with the correct proportions.
This video is helpful and will walk you through the process step by step-
https://www.youtube.com/watch?v=P4oPH0FMEB8 (Links to an external site.)
Pause the video or slow the playback speed so you can follow along and draw a manikin figure from the front and from the side.
Then, try to draw it a 3rd time - the manikin figure sitting down or standing with arms stretched out or overhead. Remember - the proportions should remain the same, use a ruler to measure if you need to.
Turn in a photo of your drawings
1. Manikin facing forward
2. Manikin facing sideways
3. Manikin sitting or with arms outstretched
|
|
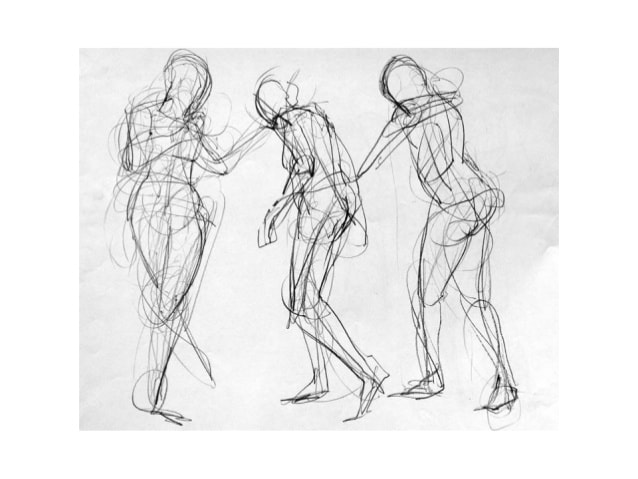
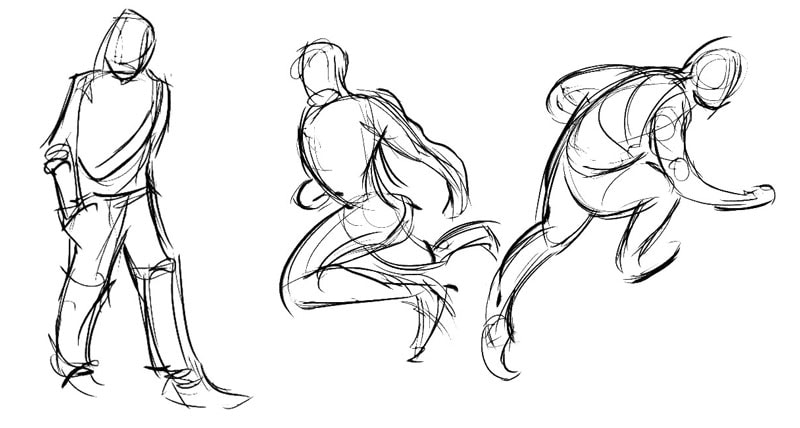
Gesture Drawing
Watch the following video:
https://www.youtube.com/watch?v=xbE0vYgng00 (Links to an external site.)
Pause the video and try to draw the same poses as the artist in the video -
1. Man holding a book
2. Man walking with a phone
3. Man standing on one foot
4. Woman standing on one foot
5. Woman standing on one foot/arms up
Watch the video several times, adjusting the payback speed might also be helpful.
Submit a photo of your drawings.
Part 2:
Draw from life: You could draw a sibling or parent and ask them to pose for you. If no one is available, you could draw yourself using a mirror or work from a photograph. Spend at least 10 minutes on each drawing.
Submit a photo of at least 4 drawings (a different pose each time).
|
|
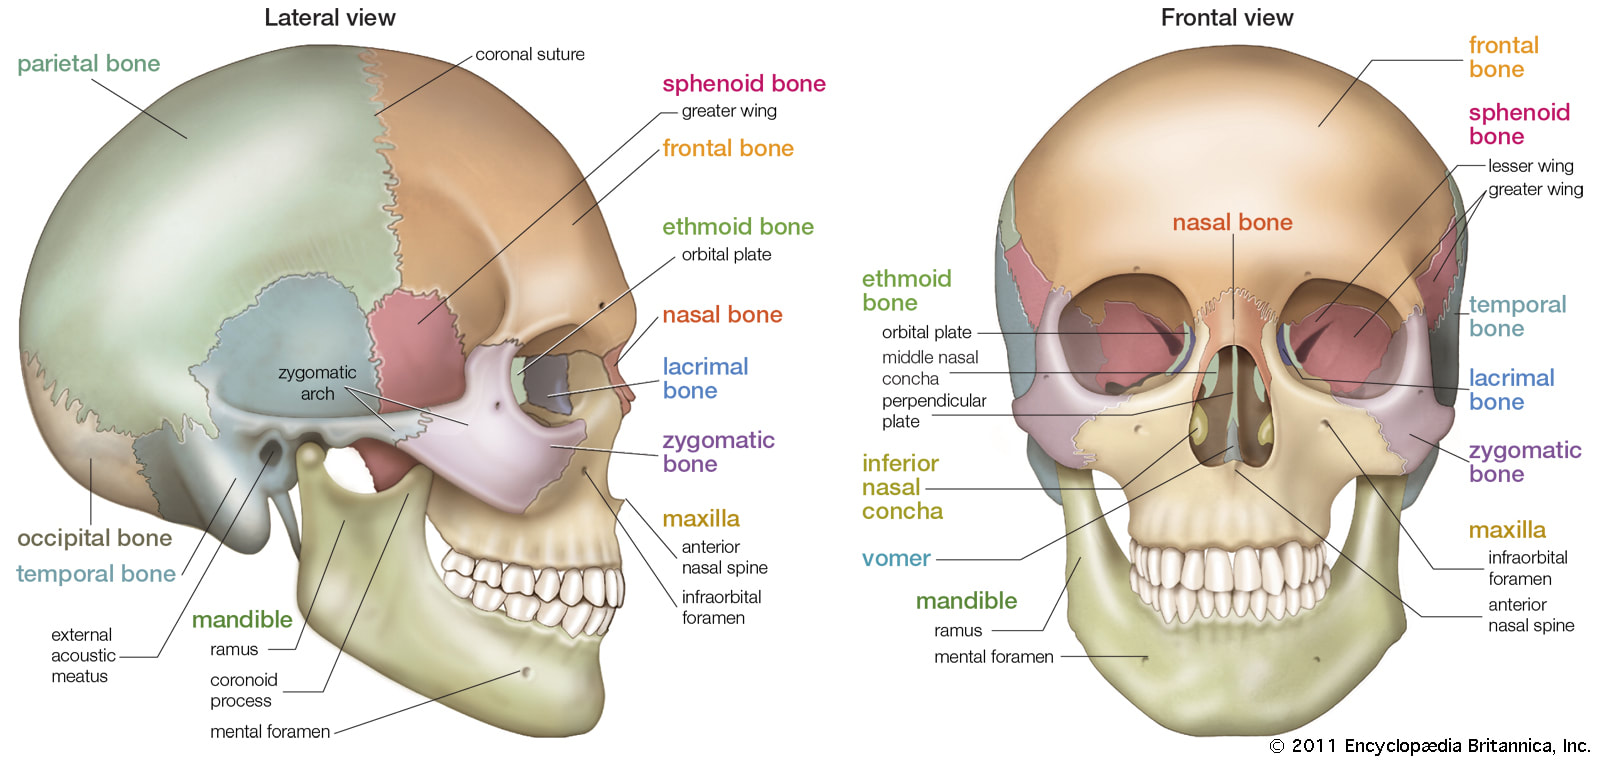
Drawing the Skull
This week we will continue drawing the body. Today we will be drawing the skull.
https://www.youtube.com/watch?v=n1Cn2osFwqE&feature=youtu.be
Follow along with the video to draw the skull from the front and the side.
Upload a photo of your drawings.
https://www.youtube.com/watch?v=n1Cn2osFwqE&feature=youtu.be
Follow along with the video to draw the skull from the front and the side.
Upload a photo of your drawings.
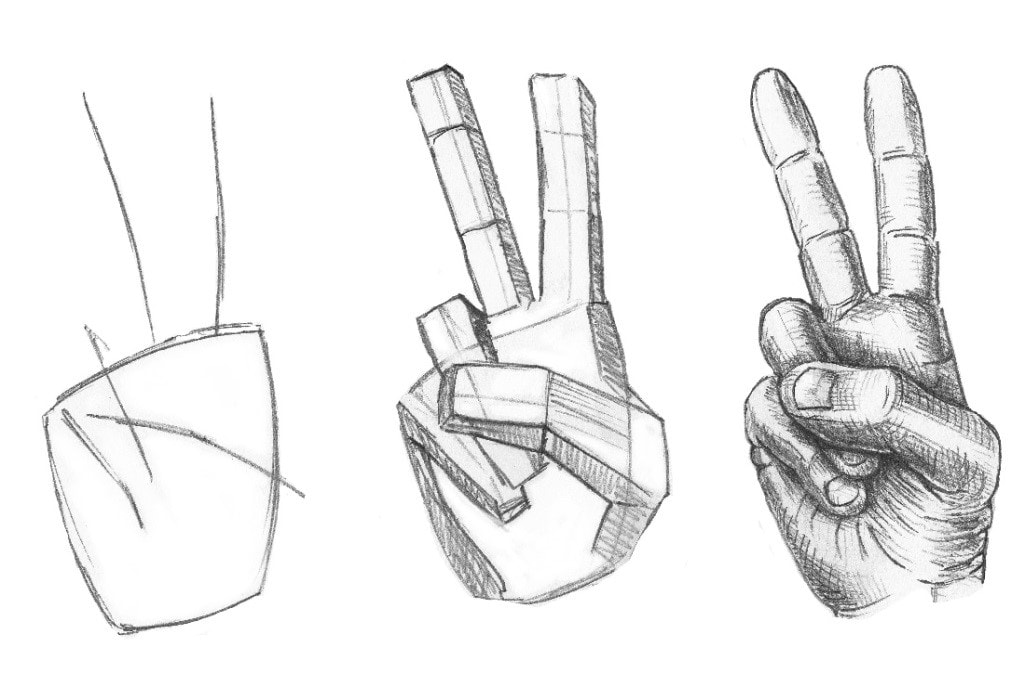
Drawing Hands
Today we will practice drawing hands.
This is a long video, but very helpful and detailed!
https://www.youtube.com/watch?v=j739xyYn0fE&feature=youtu.be
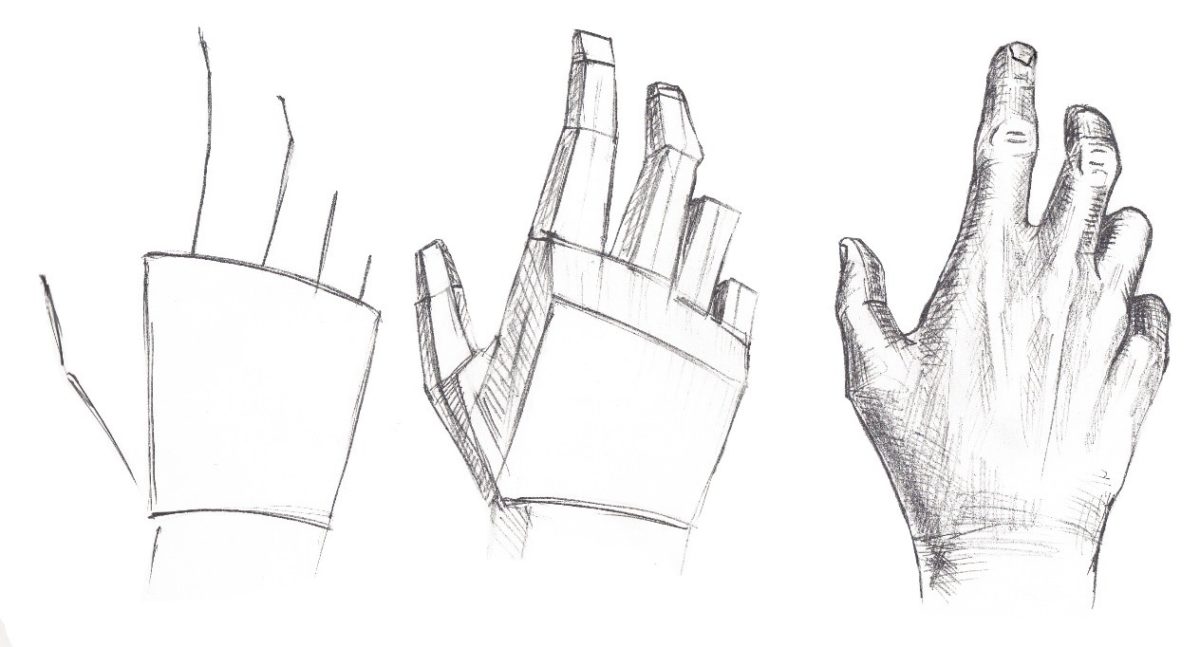
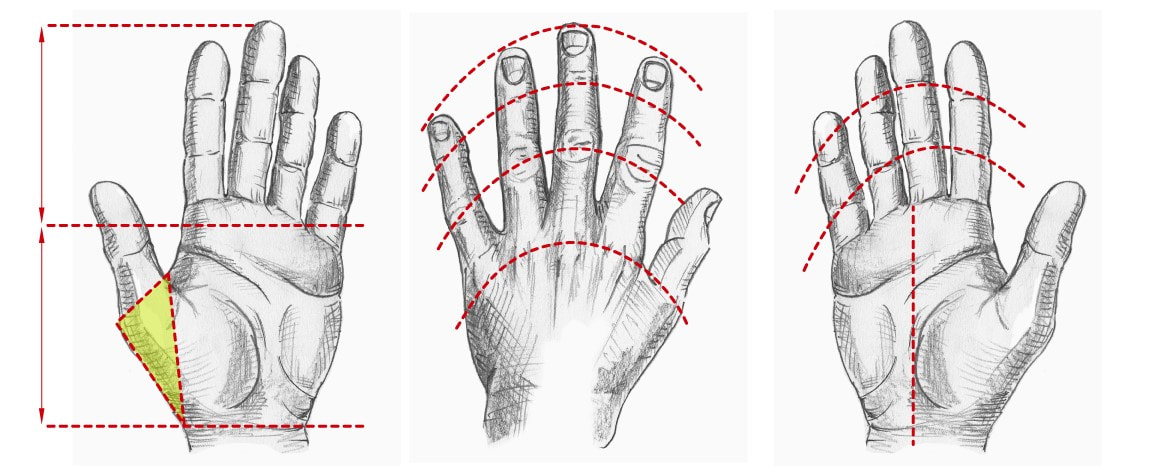
1. Begin by drawing the general shape of the palm or back of the hand as a square, slightly wider at the top than bottom.
2. Loosely add lines for the fingers, beginning with the middle fingers and arcing the others down around it.
3. Give the fingers some dimension by “boxing” them out—remember, fingers are actually more rectangular than circular.
4. Sketch the triangular base of the thumb on the same side of the palm as the index finger and add the thumb shape.
5. Add the details, including rounding the finger tips, adding finger nails, and sketching in knuckle and joint lines.
Try to draw your hand in two different poses/positions. Add shading.
This is a long video, but very helpful and detailed!
https://www.youtube.com/watch?v=j739xyYn0fE&feature=youtu.be
1. Begin by drawing the general shape of the palm or back of the hand as a square, slightly wider at the top than bottom.
2. Loosely add lines for the fingers, beginning with the middle fingers and arcing the others down around it.
3. Give the fingers some dimension by “boxing” them out—remember, fingers are actually more rectangular than circular.
4. Sketch the triangular base of the thumb on the same side of the palm as the index finger and add the thumb shape.
5. Add the details, including rounding the finger tips, adding finger nails, and sketching in knuckle and joint lines.
Try to draw your hand in two different poses/positions. Add shading.
|
|
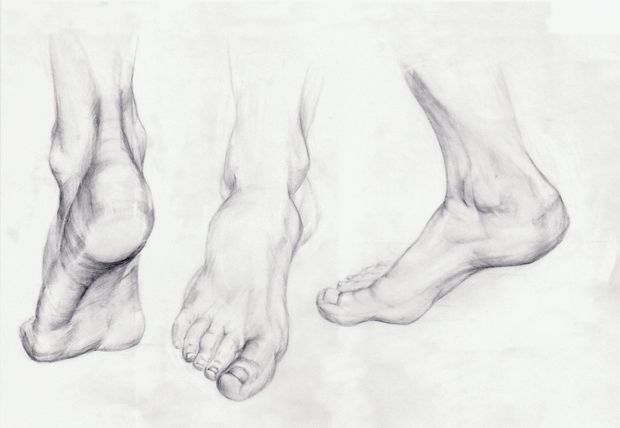
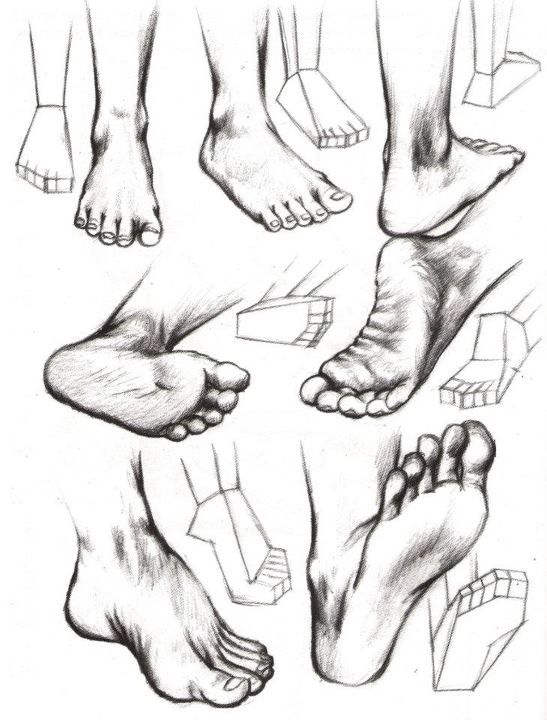
Drawing Feet
Today we will practice drawing feet.
Watch the video here: www.youtube.com/watch?v=5KZ9KFkehoc&feature=youtu.be
Draw at least FOUR feet. Start with the simple forms, then define the shapes and add shading.
Turn in a photo of your drawings.
Watch the video here: www.youtube.com/watch?v=5KZ9KFkehoc&feature=youtu.be
Draw at least FOUR feet. Start with the simple forms, then define the shapes and add shading.
Turn in a photo of your drawings.
|
|
