SCREEN PRINTING & T-SHIRT DESIGN
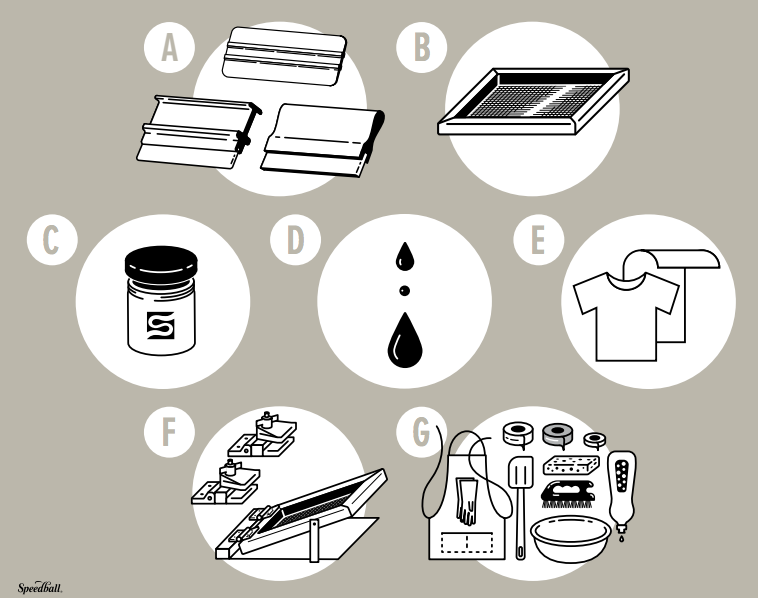
MATERIALSA. Squeegee
B. Screen C. Fabric Ink D. Photo Emulsion E. Shirt or other fabric products (bags, jackets, etc) F. Frame Base G. Cleaning supplies, tape want to keep it? buy your own frame here: Amazon speedball frame |
|
SAFETY GUIDELINES
Wear gloves when applying emulsion. Wash hands thoroughly when you are done.
PROCESS STEPS
PREPARING A SCREEN
1. Mix Emulsion
- Follow directions on the container, adding water to the sensitizer and then mixing with the emulsion
2. Coat the Screen
- Using the squeegee, apply a thin, even layer to both sides of the screen.
- Return excess emulsion to the container
3. Dry the Screen
- Dry flat side down
- Prop up so the screen is not touching the table
- Must dry in complete darkness, use a box and seal carefully
4. Create Artwork
- Image is a "positive" - the parts you draw will print
- Email to Mrs. Heredia to print on transparency paper
5. Expose the Image
- Place the image transparency on top of the screen.
- Expose the screen to light using the shop light setup in room 61
- Exposure time: 7 minutes
6. Wash the Screen
- Rinse the screen under the sink until the emulsion loosens and washes out, be patient it takes several minutes
7. Let screen dry
You are now ready to print!
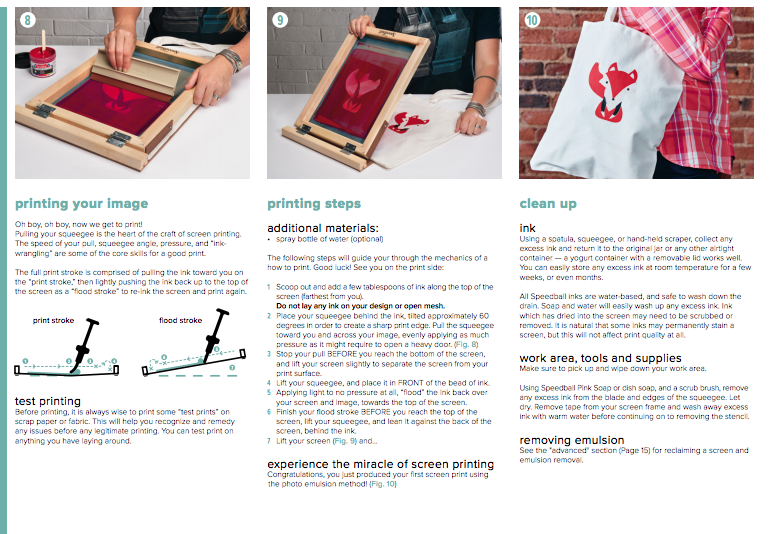
PRINTING
1. Place the screen in the machine and tighten the screws to secure it
2. Apply a bead of ink along the top of your screen
3. Place your shirt on the platform below
4. Lower the screen
5. Squeegee the ink across the screen, with firm even pressure
6. If printing a second image, flood the screen by gently squeegeeing the excess ink back to the top
7. When done, rinse the screen thoroughly, ink left in the screen cannot be removed!
1. Mix Emulsion
- Follow directions on the container, adding water to the sensitizer and then mixing with the emulsion
2. Coat the Screen
- Using the squeegee, apply a thin, even layer to both sides of the screen.
- Return excess emulsion to the container
3. Dry the Screen
- Dry flat side down
- Prop up so the screen is not touching the table
- Must dry in complete darkness, use a box and seal carefully
4. Create Artwork
- Image is a "positive" - the parts you draw will print
- Email to Mrs. Heredia to print on transparency paper
5. Expose the Image
- Place the image transparency on top of the screen.
- Expose the screen to light using the shop light setup in room 61
- Exposure time: 7 minutes
6. Wash the Screen
- Rinse the screen under the sink until the emulsion loosens and washes out, be patient it takes several minutes
7. Let screen dry
You are now ready to print!
PRINTING
1. Place the screen in the machine and tighten the screws to secure it
2. Apply a bead of ink along the top of your screen
3. Place your shirt on the platform below
4. Lower the screen
5. Squeegee the ink across the screen, with firm even pressure
6. If printing a second image, flood the screen by gently squeegeeing the excess ink back to the top
7. When done, rinse the screen thoroughly, ink left in the screen cannot be removed!
Watch the Speedball YouTube series of videos (Part 1-5)
TIPS
Be cautious of light when applying emulsion to your screen, it needs to stay in total darkness until you expose your image!
When printing - Rinse the screen right away, if you allow ink to dry it will clog your stencil and cannot be removed!
When printing - Rinse the screen right away, if you allow ink to dry it will clog your stencil and cannot be removed!
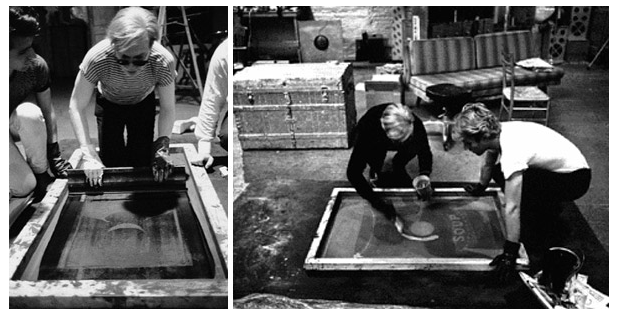
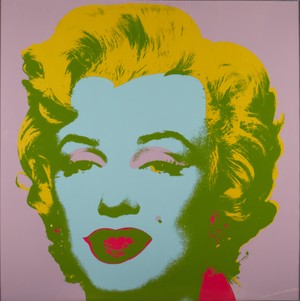
Artist Inspiration - Andy Warhol
For most of the twentieth century, screen-printing techniques were considered, “trade secrets” and were kept confidential. It wasn’t until the 1960s, with the help of Andy Warhol, that it became a more widely recognized art form.
Read more about his screen printing work here: http://artmuseum.princeton.edu/object-package/andy-warhol-screenprints/112540
Read more about his screen printing work here: http://artmuseum.princeton.edu/object-package/andy-warhol-screenprints/112540
|
|
PROJECT GUIDELINES
DESIGN AN ORIGINAL T-SHIRT
You can be inspired by existing brands but the design must be original, no copies.
1. Brainstorm at least TEN ideas in your sketchbook. Have final design approved.
2. Create your design on paper or in the computer - ONE COLOR only.
3. Print at least five copies of your design - bring in t-shirts or other materials to print on.